
Products You May Like
I Want To Draw – Do you battle with a straightforward circle from the initial step of each instructional exercise? Do your straight lines continue to twist, regardless of how diligently you attempt? Do you are incapable to draw two focuses with a given distance between them? Do your photos look off-base even after rehashing cautiously every progression from a point-by-point instructional exercise?
These issues might come from an absence of fundamental abilities that are overlooked when figuring out how to draw. Truth be told, these abilities are clear for somebody who’s been drawing a ton, however, they likewise can be handily forgotten following a couple of years without a pencil in your grasp. So would you say you are prepared to find the best drawing practices for amateurs? (I Want To Draw)
If you’re searching for a pre-game inspirational lift before taking on this test, look at the going with the article, What’s Your Excuse? For what reason Can’t You Draw?
Assuming that you’re drawing carefully, maybe you need your work to look as though it was made with pencil and paper. If so, may we suggest one of the numerous Photoshop brush sets accessible on GraphicRiver, including this Classic Art Brush Pack?
Exemplary Art Brush Pack
Brush Pack Professional volume 4 – Classic Art
-
Break the Straight Line
Your concern: you’re not ready to define a straight boundary/wonderful circle.
I Want to Draw Tutorial Straight Line Drawing
Stage 1
Straight-line drawing by hand isn’t genuine. It exists just in vector, as the most limited way between two places. You can cheat and utilize a ruler, however, no doubt your hand won’t ever figure out how to draw a straight, long queue. Regardless of whether it begins as something great, the more you draw it, the more slip-ups can be made. What’s the significance here?
Assuming defining a long boundary is exceedingly difficult, we can utilize short lines that our hand is more adjusted for. This way it won’t make any difference what apparatus you use to define straight boundaries; they’ll for the most part come out very great. Simply check out the image beneath. The more limited the lines, the nearer to the first the image is.
I Want to Draw Tutorial How to Draw a Straight Line
Stage 2
Suppose you need to draw a bloom like the one beneath. You can see it’s worked of a straight line, an ideal circle, and a couple of bends with exact points. I suppose you can draw it gradually, cautiously, driving the lines from one highlight to another, with your tongue stood out and sweat all over. Yet… why? Drawing isn’t an errand, it ought to be entertaining! (I Want To Draw)
Drawing Exercises for Beginners Tutorial Draw a Flower
Stage 3
Specialized drawing (straight lines, amazing circles) requires fixation. It’s tied in with drawing things precisely as they are. There’s no space for imagination or individual style since style comes from variety. Is it truly what you need to do? Draw the same things the very same way constantly?
If you do, all things considered, there’s no instructional exercise for you. Since drawing—creation—is tied in with keeping your hand loose while being centered around the last impact as opposed to making a progression of amazing lines. That is the thing that you want to realize—how to keep loose, outlining rapidly and indiscreetly. How about we attempt to draw this bloom indeed, will we? Be that as it may, this time, keep these straightforward guidelines:
Partition the long queues into short ones.
The more bends, the more limited the lines.
Contact the paper gently; don’t press your pencil hard.
Keep it quick!
Drawing Exercises for Beginners Tutorial Draw a Flower Ani
Basic Drawing Exercises for Beginners Tutorial Draw Flower Step 3
Stage 4
Wasn’t excessively fun? On the off chance that you squint your eyes, it even looks very done. Presently, occupy the spaces within with the ones it’s deficient. The guidelines from the past advance apply. (I Want To Draw)
Drawing Exercises for Beginners Tutorial Draw Flower Step 4
Stage 5
You would now be able to stretch the characterized lines with a marker or squeeze the pencil harder. This progression isn’t required; you can skip it.
Drawing Exercises for Beginners Tutorial Draw a Flower Step 5
Stage 6
It’s finished! It doesn’t look precisely like the first, however, you can see some style in it, a touch of your personality, a genuine work of your hands! You can see it even looks more normal than the first since nature is somewhat flawed. What’s generally significant, when you cross the limits, you can undoubtedly make a huge difference!
Perplexingly, the less precise your straight-line drawing is, the more regular the outcomes.
Drawing Exercises for Beginners Tutorial Draw Flower Step 6
Stage 7
Since you’ve figured out how to define a straight boundary, what would it be advisable for you to rehearse? (I Want To Draw)
Partition the lines into short ones.
Draw circles made of short lines rather than long, steadily bowing ones.
Draw daintily—along these lines, your little slip-ups will not be apparent.
Basic Drawing Exercises for Beginners Tutorial Draw Fast
-
Instructions to Create Your Style of Art
Your concern: you believe you can just draw things others have effectively made. Your drawings never seem as though something is genuinely yours. Assuming that is valid for you, then, at that point, it’s an ideal opportunity to figure out how to make your specialty style.
Straightforward Drawing Exercises for Beginners Tutorial How to Make Your Art Style
Stage 1
So you can draw circles and straight lines, isn’t that so? That is not great. You might be trapped in numerical standards and specialized drawing—you’re incredible at rehashing, however not making.
How might you help yourself? All things considered, the initial step of this instructional exercise is useful for you as well, yet there’s another stunt you can utilize. (Complete Tutorial of Drawing For Beginners)
As I said previously, style comes from variety. On the off chance that you’re redrawing an image cautiously, line by line, without adding anything new (because it would be an error!), you can’t wind up with something else.
The first wasn’t yours, and your drawing is only a duplicate. I don’t say you shouldn’t follow instructional exercises any longer; you ought to simply be more innovative and—oddly—less exact while doing it.
How to lose a sensible piece of accuracy? How about we start with this basic exercise: draw a couple of basic shapes with your hand shaking, as though you were feeling anxious. Do it until you feel your hand is loose.
Drawing Exercises for Beginners Tutorial Shaky Hand
Stage 2
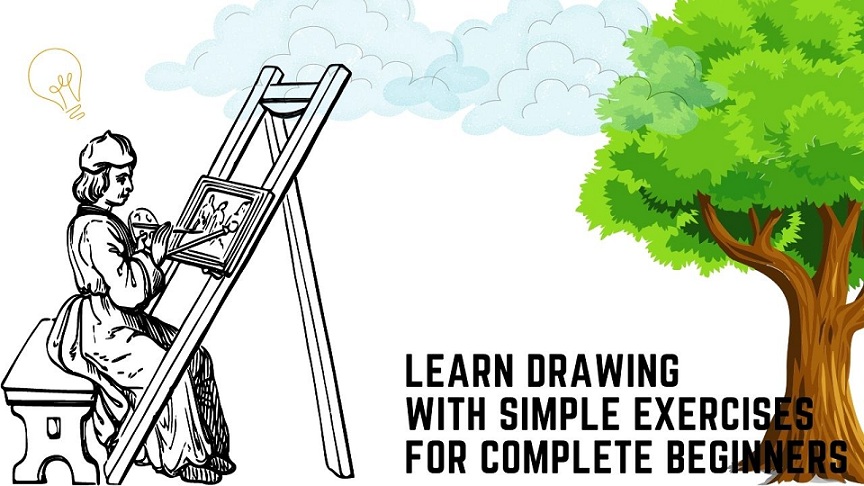
We should attempt this basic instructional exercise now. Do this the same way obviously, however in Step 4 shake your hand when defining the last boundaries. Draw a couple of these heads, changing the degree of jerk without fail. (Learn Drawing with Simple Exercises for Complete Beginners)
Instructions to Create Your Art Style Tutorial Lose Precision
Stage 3
Astounded? Each head appears to be unique from the first, however, you can perceive what you’ve recently drawn. Likewise, you involved similar extents for them all, yet not a single one of them seems to be indistinguishable. How is it that it could have occurred?
At the point when you were figuring out how to compose, your instructor needed you to rehash lines from a format. You were investing a ton of energy in drawing (not composition) every letter as though it was a little work of art.
Then, at that point, with time and experience, you fostered your person of composing, your style. Your letters appear to be unique than mine or your companions’, yet, we would all be able to understand what you compose.
Your style changed because you needed to compose quickly—to record your musings, not to draw great but rather inane letters. (Complete Tutorial of Drawing For Beginners)
Apply this standard to your drawings. Ponder what you need to accomplish, not with regards to the lines. Draw quick, and your own, novel hand development will get an opportunity to sparkle.
Instructions to Make Your Own Art Style Tutorial Lose Precision
Stage 4
There’s something else that amounts to your style: inventiveness. Do a similar instructional exercise by and by, this time changing the progression results to your necessities. You’re figuring out how to draw a mythical serpent’s head, however, imagine a scenario in which mythical beasts to you have longer mouths.
Don’t sweat it! You don’t have to observe additional drawing practices for amateurs for that. Simply change the principles to your necessities. (Learn Drawing with Simple Exercises for Complete Beginners)
Instructions to Create Your Art Style Tutorial Be Creative
Stage 5
Okay, so you currently know how to make your specialty style. What’s next for training?
Attempt to draw things from your current circumstance with insecure, imprudent lines, without stressing over the impact. (Complete Tutorial of Drawing For Beginners)
Sketch a great deal! Try not to ponder the outcome, just let your hand practice its normal development.
When following instructional exercises, remain inventive—change lengths, shapes, distances, and see where it takes you.
Instructions to Make Your Art Style Tutorial Be Creative
-
Instructions to Measure and Draw Proportions
Your concern: your extents consistently look off. You feel unfit to draw a given distance without utilizing a ruler or different devices.
Drawing Proportions Tutorial Proportions Are Off
Stage 1
Wrong extents are an enormous issue for a yearning craftsman. Fortunately, it tends to be survived assuming you don’t disregard it. To start with, what are the extents?
Extents aren’t a distance estimated in some units. They characterize the area of a component comparative with others. That implies that to draw the entire picture (set of components) twice greater, every one of the distances should be multiplied as well.
Best Drawing Exercises for Beginners Tutorial Drawing Proportions
Stage 2
How about we train our eyes to see and redraw extents. To start with, attempt to redraw this image, yet all the same twice more modest:
Best Drawing Exercises for Beginners Tutorial Drawing Proportions
Stage 3
Presently, take a ruler and check if you hit the nail on the head: the distance ought to be twice more modest than on the screen. Furthermore, how’s your outcome? Most likely not generally excellent, if you’re perusing this drawing extents instructional exercise. Notice that the circles ought to be twice more modest as well, and that appears to be exceptionally difficult: how might you draw a circle that is twice as large, assuming you don’t have the foggiest idea about the first size? (Learn Drawing with Simple Exercises for Complete Beginners)
The response is that we want no less than two components to discuss relativity. Regardless of size, the principal component is, it can’t be unproportional, on the off chance that there’s just one! So how about we attempt once more. Draw just the principal circle.
Best Drawing Exercises for Beginners Tutorial Drawing Proportions
Stage 4
Presently envision two lines coming from the focal point of the circle. There’s a third fanciful line interfacing the two circles. Would you be able to see what point it makes? Define this boundary on your image, without adding the second circle until further notice.
Assuming you generally dislike seeing the point, attempt to separate the right point into thirds, then, at that point, each third into thirds once more. Every one of them is 10 degrees.
Best Drawing Exercises for Beginners Tutorial Drawing Proportions
Stage 5
We want to set the distance now. What number of circles can be placed between the two habitats in the first? Apply this relationship to your image. Interestingly, it’s ideal to print the first and draw different circles truly.
Afterward, you can attempt just imagining you’re drawing them (keeping the pencil right over the paper/screen and seeing the circles to you).
Step by step instructions to Draw Proportions Tutorial Drawing Proportions
Stage 6
It’s practically finished! Presently we want to check what the size of the subsequent circle is corresponding to the large one. A decent strategy for this is to envision the second circle inside the first to see the extent.
Step by step instructions to Draw Proportions Tutorial Drawing Proportions
Stage 7
Done! You can utilize the ruler back to perceive how exact it is. This technique is great when your eyes aren’t prepared to see extents yet, and with time you will not have to draw the aide components any longer.
Instructions to Draw Proportions Tutorial Drawing Proportions
Stage 8
You’ve done it! You went through every one of the means in figuring out how to draw extents. For more practice, do the accompanying:
Figure out how to see extents all over. Glance around and ask yourself: How long are my fingers in contrast with the palm? What number of heads can be placed in succession along my canine’s back? What component of the face could fit flawlessly between the eyes? This preparation should be possible in your extra time, and it builds your fixation. Likewise, with time, your eyes will figure out how to do it without your mindfulness!
If you generally dislike reproducing sizes (for instance, you draw two indistinguishable circles and they’re dependably unique), don’t try to rehearse it.
Draw these two circles as long as you can draw them indistinguishably, and afterward attempt something similar with triangles, squares, etc. This issue should be addressed before doing some other instructional exercise since it’s the foundation of different abilities.
The Internet is brimming with straightforward, bit-by-bit instructional exercises that don’t show any genuine drawing abilities, yet they’re extraordinary for rehearsing extent.
Start with the least difficult pictures for kids and continue when you feel more sure. Once more, don’t go further before setting up these essential abilities. Nothing solid can be based on a frail base.
Step by step instructions to Draw Proportions Tutorial Drawing Proportions
-
Free Your Hand
Your concern: you track down defining equal or simultaneous boundaries extremely hard The subsequent line consistently heads off course some way or another.
Best Drawing Exercises for Beginners Tutorial Rigid Hand
Stage 1
This happens now and again when you’re making a decent attempt. You need to be exact and, accordingly, you draw gradually and cautiously, giving your hand more opportunity for botches. Attempt to define the two boundaries quickly: Does it change anything? If indeed, all things considered, I’m happy I could help! Assuming no, a little preparation might be required.
Drawing snakes is the best and the most perplexing preparation I can imagine. It allows you to rehearse extents, arrange lengths, change size and points, and, in particular, it helps your hand how to move nimbly.
On the off chance that you’re perusing this passage, you likely disapprove of snakes as well—they’re thick at a certain point, then, at that point, flimsy and thick once more, absolutely muddled and wrong. In any case, we can fix it!
Start with a column of circles, everyone more modest than its archetype. End the line with a solitary point.
Best Drawing Exercises for Beginners Tutorial I Can’t Draw Snakes
Stage 2
Interface the relating finishes of the measurements. A straightforward snake is finished! There’s something else to learn.
Stage 3
Presently draw a progression of similar circles, yet changing their positions upward as well.
Stage 4
Associate them once more.
Stage 5
How about we increment the trouble level. Do likewise as in the past, however presently leave greater spaces between the circles.
Stage 6
Associating the circles might be more enthusiastically now since you want to draw the curves. This is a genuine practice. Draw the snakes, long and short, straight and twisted, utilizing greater spaces between the circles each time you see you took care of business. If you do this adequately long, your hand ought to become familiar with the legitimate development.
iwanttodraw-4-6-I-can not draw-snakes
Stage 7
What to rehearse?
Snakes! Draw a ton of them; they’re quick and simple;
Draw a progression of equal lines and waves as quickly as could be expected. Allow your hand to feel it’s free!
Define wavy boundaries when sitting in front of the TV or perusing articles on the Internet. It doesn’t make any difference what you’re drawing, simply encourage your hand how to move uninhibitedly and recklessly.
Drawing Exercises for Beginners Tutorial I Can’t Draw Snakes
-
Realize What Things Are… What’s more Why They Are
Your concern: you can’t draw from a creative mind. Everything goes right when you follow an instructional exercise, however at that point, you can’t recollect the means, or there’s just one represent that ends up good overall.
Stage 1
Even though the best drawing practices for amateurs won’t help you here, you’ll be happy to hear this isn’t as large an issue as it appears. You just need to change your mentality. The issue is that you figure out how to define boundaries rather than what the article is. There are two sorts of data:
Framework (raster): Where’s the point? What’s it associated with? What’s the distance between them? What number of them happen in a given region?
Vector: What’s the point for? What’s this point part of? How does this arrangement of focuses respond? How can it impact different components?
Grid data is a format to make the same thing once more. It’s memorable’s difficult, and it’s valuable just in a couple of cases. Vector data is versatile. It implies that when conditions change (Diverse Posture, size, style), the components conform to them since they’re appended to extents, not position. Here is a model:
Lattice Dog Head Information
C1 – nose
C3 – eye
C1-E3 – mouth
A3-E5 – head (and so forth)
Vector Dog Head Information
The head is made of two circles: a “cerebrum case” and a mouth.
The mouth is without a doubt higher than the center of the cerebrum case.
The eye is round, and it begins at the center of the cerebrum case, contacting the mouth.
The nose is on the tip of the mouth, and it’s pretty much as large as the eye (and so forth)
Assuming that you might want to change something, for instance, open the mouth, grid data falls flat. It’s fixed, versatile just as far as size, and it’s much more pointless when you need to make a posture in 3D space. How might you learn in vector, then, at that point?
Stage 2
Take an object and investigate it. There are two different ways of reasoning you can utilize now (I’ll utilize glass for instance):
The glass is made of a square shape, then, at that point, there’s a level triangle under it, a very long queue, and a level triangle once more.
The glass is made of an oval compartment with a round segment where wine is poured. The upper piece of the holder can be adapted to within, to prevent the air pockets from getting endlessly. The lower part of the compartment dissolves delicately into a thick leg. The leg then, at that point, dissolves into a roundabout help.
What is your take? What direction better portrays the substance of a glass? The first is quick and incredible when you start your experience withdrawing, however, it will just allow you to draw this specific position. You might attempt to go into a 3D world, learn viewpoint, add some movement, and out of nowhere, it turns out you don’t have the foggiest idea how to draw a glass.
Stage 3
Another model is life structures. You might gain proficiency with the bends of a body in one posture, however, it doesn’t enlighten you anything regarding what a similar body resembles when running/sitting/battling. A basic “why” has never been just strong. For what reason is this part swelling? What’s it utilized for? For what reason is it long/short? For what reason is this part associated with some specific one?
Stage 4
What to rehearse?
Stop neglectfully duplicating the lines you’re seeing. Attempt to comprehend the article all in all. Assuming you comprehend the reason why it’s fabricated and drawn this way, you’ll have the option to adjust it and make something yours, without disrupting the guidelines.
Investigate protests in any event, when you’re not drawing. In a line, in a transport, hanging tight for somebody—glance around and ask yourself: for what reason does it resemble this? What’s its motivation? With each replied “why”, you’re expanding an enormous base of vector data in your mind. You’ll be amazed at the amount it makes a difference!
Presently You’re Ready to Draw!
Assuming you’ve followed the instructional exercise cautiously, later some training you ought to have the option to follow moderate instructional exercises impeccably. While these drawing practices for novices might appear to be exhausting, they’re fundamental and should be learned.
Assuming you attempted them and they appeared to be trifling, that is extraordinary, you’re prepared! In any case, assuming you had a few issues, it’s truly better to stop here and practice until you defeat them.