Products You May Like
Anime and manga are popular Japanese forms of animation and comics that have a very distinct art style. If you want to draw your favorite character or design one on your own, start by designing their head and face so you can sketch what they look like. (Draw Anime or Manga Faces)
When you first start the head, draw the outline and the basic shapes so you can properly place the features. Once you add the eyes, nose, ears, and mouth, you can erase your guidelines and sketch in a hairstyle. With a bit of practice and patience, you’ll be able to design anime faces in no time!
Part 1 – Drawing the Basic Head Shape
Find the middle of your circle and lightly sketch a straight line that extends from the top of the circle down your sheet of paper so you know where the middle of the face is.
Start by drawing your circle large so you have room to draw the features. Otherwise, your lines may get messy and it could be hard to draw correctly.
Tip: If you have trouble drawing a circle without help, either use a compass or trace something circular.
Make a guideline for the eyes a third of the way up from the bottom of the circle. Measure about a third of the way up from the bottom of your circle and use your pencil to make a mark. (Draw Anime or Manga Faces)
Use a straightedge to draw a horizontal line that extends past the edges of the circle to use as a guide for the character’s eyes. Don’t apply too much pressure when you draw the line since it will be hard to erase otherwise.
Your measurements do not need to be precise. If you don’t have a ruler, estimate the distance with the end of your pencil instead.
Put a horizontal line across the bottom of the circle for the nose line. Find the lowest point on the circle you drew and set a straightedge horizontally across it.
Draw a light, straight line along the bottom of the circle so it extends past the circle’s widest point. In your finished drawing, the tip of the nose will be along this line.
Place a horizontal mark for the chin underneath the circle. Find the distance from the center of the circle to the line you drew for the nose.
Measure down from the bottom of the circle (or the nose line) to the distance you just found and make a small horizontal mark on the vertical centerline The mark will be the tip of the character’s chin when you’re finished.
If you’re drawing a female character, place the mark at a distance equal to ⅓ of the circle’s diameter since female anime and manga characters tend to have rounder faces.
Outline the jaw for your character. Start on either the left or right side of the circle at its widest point. Draw a line from the side of the circle that’s slightly angled toward the vertical centerline Continue drawing the line until you reach the mark you made for the nose.
Once the angled line crosses the nose guidelines continue drawing it toward the mark you made for the chin. Repeat the process on the other side of the circle to connect your jawlines
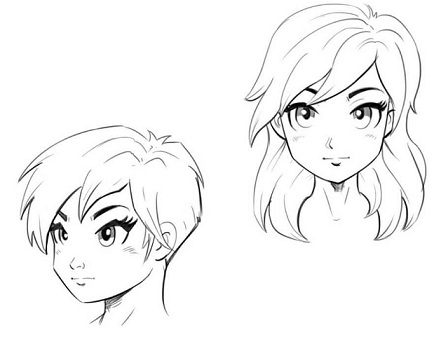
Female anime and manga characters tend to have rounder faces and pointier chins than male characters. Use curved lines rather than angled ones if you plan on drawing a female character.
Older characters usually have taller, narrower faces than younger characters. Curve the lines more when you’re drawing the jawline.
Sketch in a neck coming down from the head. The width of the neck depends on if you’re drawing a male or female character. If you’re drawing a male character, position the sides of the neck closer to the sides of the jawline to show a muscular build.
For a female character, place the lines for the neck closer to the chin so it’s narrower. Make straight vertical lines extending from the jaw on each side of the face to make the neck.
Younger manga or anime characters will have a narrow neck since they aren’t as muscular or defined. When you’re drawing a young boy or girl character, make the neckline closer to the chin than the sides of the jaw.
Hold your drawing out in front of you to see if the neck looks too long or short while you’re drawing it. Erase or extend the lines further depending on how it looks to you.
Part 2 – Adding the Features

Sketch oblong C-shapes between the guidelines or your ears so they connect to the sides of the circle and jawline. You can either leave the ears as is for a simple look or draw the curves inside them to add more detail.
Look at your ears or pictures of real ears to get an idea of what they look like.
Ears can be various shapes, so choose whatever looks best on your character.
Add the tip of the nose where the horizontal and vertical lines intersect. In an anime or manga, the nose isn’t as visible from the front view as it is from the side.
If you want to make a simple nose, just put a dot on the point where the nose guideline and the vertical centerlineintersect. For something slightly more complex, draw 2 short curved lines on either side of the centerline to give the appearance of nostrils.
You can also draw a long straight or curved line extending up toward the eye line if you want to make your character’s nose more defined.
Draw the eyes so they’re below the guideline you drew earlier. If you’re drawing a male character, draw a horizontal line under the guideline you made that stops near the side of the head.
For a female character, draw an arched line underneath your guide that goes toward the side of your character’s head. Place the bottom line for the eye anywhere above the tip of the nose. Draw the other eye on the opposite side of the face so it looks the same as the other.
Anime or manga characters have a variety of different eye shapes, so check your favorites to get ideas on how to draw the eyes on your character.
Practice drawing different eye expressions if you want your character to have a particular emotion. For example, an angry character may have narrower eyes and a surprised character will have their eyes wide open.
Give your character eyebrows above the eye line. Start the line for your character’s eyebrow above the corner of their eye slightly above the guideline you drew before.
Draw a slightly curved or angled line, following the same shape as the top of the eye. You can either leave the eyebrow as a simple line or extend lines up from it and make it a rectangle. Draw another eyebrow over the other eye once you finish the first one.
Anime and manga eyebrows can be many shapes, like triangles or even circles.
Angle the eyebrows more if you want to make your character more expressive. For example, if the eyebrows are angled down toward the nose, then your character will look angry, but if you angle them down toward the ears, they’ll look sad or scared.
Put the mouth halfway between the nose and the chin. Find the halfway point between the character’s mouth and chin so you know where to place the mouth.
If you want to make a simple mouth, draw a slightly curved horizontal line to make a smile or a frown. Put another slightly smaller line underneath the first to give the appearance of a bottom lip.
Look at different mouths and expressions for anime characters online to see how to make different expressions. If you want to draw your character smiling with an open mouth, you do not need to draw every individual tooth. Only draw the line between the top and bottom teeth to separate them.
Tip: The size of your character’s mouth depends on what expression you want them to have. If you want your character to look a little goofier, then make the mouth wide. For a more serious or quiet character, make the mouth small.
Part 3 – Cleaning up and Finishing the Drawing
Erase the guidelines to clean up your drawing. Use either the eraser on your pencil or a block eraser to lift any guidelines that aren’t a part of the character’s face or head.
Carefully work around any of the facial features you’ve drawn so you don’t erase their lines too much. Continue erasing the rest of the guides on your drawing until all that’s left is the face.
If you drew your guidelines too dark, then they may not fully erase off of the paper.
Use a thin eraser to get in detailed areas, like the eyes or ears.
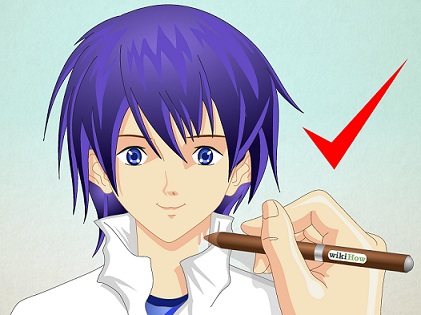
Give your character a fun hairstyle. Anime and manga characters can have a variety of hairstyles, so choose one that you think will look best on your character.
Avoid drawing every single strand of hair and instead sketch the basic shape of the style onto your character. Work lightly in pencil so you can erase and make changes if you need to.
Once you have a roughed-in shape for the hairstyle, erase any parts of the head that the hair covers so it’s not visible.
Anime or manga hair is usually broken up into clumps that end in a point. Look at the hairstyles of various characters to get ideas of how to style your character’s hair.
Tip: Practice drawing different hairstyles on a piece of tracing paper over your drawing so you don’t have to erase your character if you don’t like the style you drew.
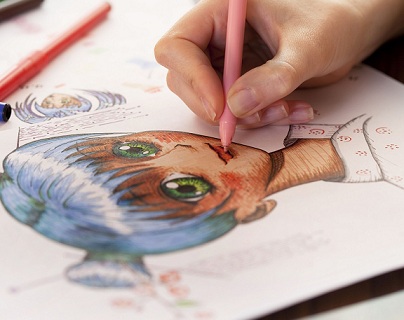
Add small details like freckles or wrinkles to your character’s face. After you’ve finalized the hair and erased the guidelines work on adding any details to make your character unique.
Give them freckles on their cheeks, moles, or wrinkles so they look more interesting. Sketch in any jewelry or accessories you want in pencil so you can erase them if you don’t like how they look.
You don’t have to add any additional details to your character if you don’t want to.
Shade the face with your pencil to give it more depth. Use the side of your pencil to lightly apply a shadow underneath the chin, bottom lip, and hair on your character.
Make sure to move your pencil in the same direction for each shadow you draw so it looks consistent. Apply more pressure to the pencil if you want to make your shadows darker.
Be careful not to make your shadows too dark or else they will look too harsh and be difficult to erase.