Products You May Like
Do you know that it is quite possible that you can pull a train from a paper? What I mean is that you can show a picture of a train that seems to be moving towards you as if it were real. Yes, that is possible only if you draw on the idea of one point. But do you have any idea how it is done?
Vision Design is a method developed by builders in the early 5th century to represent a three-dimensional image on a two-dimensional plane.
It remained the basic principle of western art for nearly five centuries. At present, this technique is already known and used by many artists, and as an art lover, I will teach you how to draw a single point of drawing an idea.
Select Extinction Point
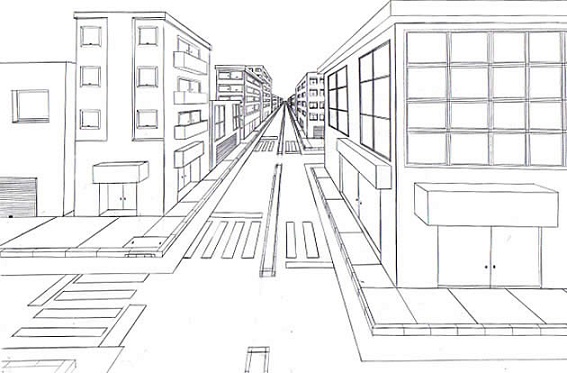
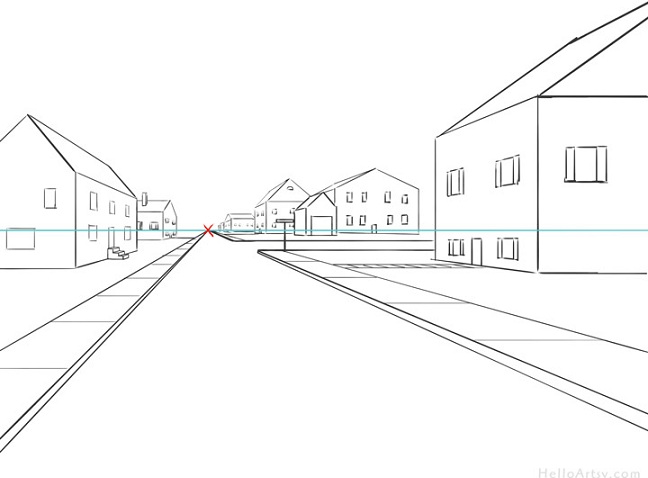
As the first and most important part of a one-point drawing idea, the point of disappearance is a point in your drawing plane where all the orthogonal lines meet. An excellent example of this is the highway, where the road seems to disappear from your sight.
So objects and spaces look small as they approach the disappearance zone until they seem to disappear. The best extinction point is somewhere where your image will appear in the center of your paper like lightning.
Draw Horizon
A boundary line is a horizontal line across your entire drawing plane that passes through your area of extinction. This line is helpful to show visual effects in your drawing or real life, representing the viewer line where the object is divided into two views, the base, and the top view.
For example, the floor is visible below the viewer’s line and the roof above. In a simple statement, the horizon determines where the viewer is headed.
Draw Orthogonal Lines
These are the extension lines from your vanity that serve as guidelines for your image and possibly provide the shape of your drawing. Orthogonal lines are often used to outline your image, its edges, divisions, and sides.
Draw Additional Lines: Horizontal, Horizontal, Sliding, and Curve
After drawing all the orthogonal lines, draw a few more lines that will help us create the image we like to show. Most of these lines are horizontal and vertical lines.
The wheels are sometimes pulled with coins to create a perfect shape, but because we are dealing with a single-point drawing, it is better to draw an ellipse with a free hand instead of a circle without looking at the front view.
Drawing the final sketch of your image with a single-point idea is now going to be easier. After following these steps, you need to clear some of the excess lines and add more details to your work; this includes tone variation and contrast and adding shadows.
And you should constantly be reminded that the pre-sketch of the image should be drawn in small lines so that we erase the overlapping lines after making the final drawing.
Topics that involve a standard structure are easier to draw from a single point of view than those that do not. Use what you have learned to improve your skills and that one day you will be able to draw not only one point of drawing theory but also other types of idea drawing, including lessons with an unusual shape.